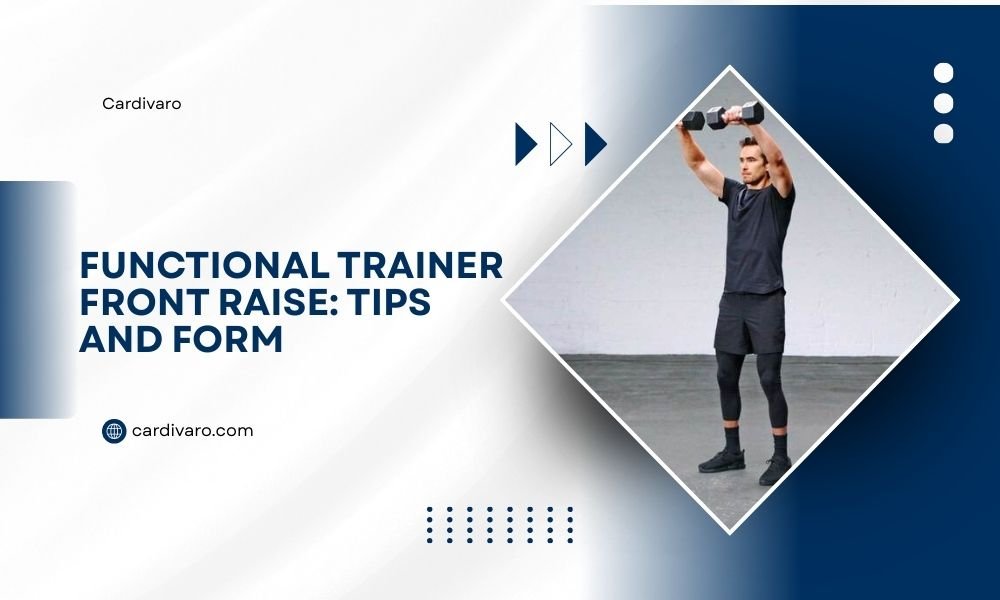
The functional trainer front raise targets your front deltoids by lifting your arms forward and up while standing at the machine’s center position.
To perform this exercise correctly, keep your core tight, shoulders back, and lift with controlled movement to shoulder height before slowly lowering back down.
What Is a Functional Trainer Front Raise
A functional trainer front raise uses cable resistance to work your anterior deltoid muscles. You stand between two cable towers and pull handles forward and upward. This movement mimics daily activities like lifting objects onto shelves.
The exercise differs from dumbbell front raises because cables provide constant tension. Your muscles work harder throughout the entire range of motion. This creates better muscle activation and growth potential.
Primary Muscles Worked
Main Target Muscles
Your front deltoids do most of the work during this exercise. These muscles sit at the front of your shoulders and help lift your arms forward. Strong front delts improve your pressing movements and shoulder stability.
Supporting Muscles
Several other muscles help during the movement:
- Core muscles stabilize your torso
- Upper chest assists with the lifting motion
- Middle deltoids provide shoulder stability
- Serratus anterior helps with shoulder blade movement
Perfect Form Step by Step
Setup Position
Stand in the center of your functional trainer with feet shoulder-width apart. Set the cables at the lowest position on both sides. Grab the handles with an overhand grip.
Your arms should hang naturally at your sides. Take a small step back to create tension in the cables. Keep your knees slightly bent and core engaged.
The Lifting Phase
Lift both arms forward and up at the same time. Keep your elbows slightly bent throughout the movement. Think about drawing an arc from your thighs to shoulder height.
Stop when your arms reach parallel with the floor. Going higher can stress your shoulder joints without added benefits. The movement should take about two seconds.
The Lowering Phase
Lower your arms back to the starting position with control. This part should take three to four seconds. Fighting gravity here builds serious strength and muscle.
Don’t let the weight stack crash down. Maintain tension in your muscles throughout the entire rep.
Common Form Mistakes to Avoid
Using Too Much Weight
Heavy weight forces you to swing and use momentum. This reduces muscle activation and increases injury risk. Start light and focus on perfect form first.
Many experts suggest starting with just 10-15 pounds per side. You can always add weight once your form becomes solid.
Lifting Arms Too High
Raising your arms above shoulder height puts your shoulders in a bad position. This can lead to impingement and pain over time.
Stop at shoulder height or slightly below. Your muscles get maximum benefit without the extra risk.
Arching Your Back
Some people arch their back to help lift the weight. This puts stress on your spine and reduces core engagement.
Keep your back neutral and core tight. If you can’t maintain good posture, reduce the weight.
Rushing the Movement
Fast reps reduce muscle tension and effectiveness. Slow, controlled movements create better results and safer training.
Programming and Rep Ranges
For Muscle Building
Aim for 8-12 reps per set with moderate weight. This rep range creates the muscle damage needed for growth. Rest 60-90 seconds between sets.
Perform 3-4 sets total. Focus on feeling the burn in your front delts during the last few reps.
For Strength Development
Use heavier weight for 4-6 reps per set. Rest 2-3 minutes between sets to recover fully. This builds maximum strength in your shoulders.
For Muscular Endurance
Higher reps work well for endurance goals. Try 15-20 reps with lighter weight. Keep rest periods short at 30-45 seconds.
Weekly Frequency
Train this exercise 2-3 times per week. Your muscles need recovery time between sessions to grow stronger.
Variations to Try
Single Arm Front Raise
Work one arm at a time to fix strength imbalances. This also challenges your core stability more than the two-arm version.
Use the same form cues but focus on keeping your torso still. Don’t let your body rotate or lean.
Alternating Front Raise
Lift one arm while lowering the other. This creates constant tension and a serious shoulder burn. Your core works overtime to keep you stable.
High Cable Front Raise
Set the cables at chest height instead of the bottom position. This changes the resistance curve and muscle activation pattern.
Resistance Band Alternative
No functional trainer? Use resistance bands attached to a low anchor point. The movement stays the same but resistance increases as you lift higher.
Safety Tips and Precautions
Warm Up First
Cold shoulders get injured easily. Spend 5-10 minutes warming up with arm circles and light movements. Your joints need to be ready for resistance training.
I found that many shoulder injuries happen during the first few reps when muscles are still cold.
Listen to Your Body
Stop immediately if you feel sharp pain or pinching. Some muscle burn is normal, but joint pain is not. When in doubt, check with a healthcare provider.
Progress Gradually
Add weight slowly over time. Jumping up too fast leads to form breakdown and potential injury. Small increases every few weeks work better than big jumps.
Benefits of Cable Front Raises
Constant Tension
Cables provide resistance throughout the entire range of motion. Free weights lose tension at certain points, but cables keep working your muscles from start to finish.
Better Control
The cable system guides your movement path. This helps beginners learn proper form and reduces the risk of injury.
Research shows that controlled movements produce better muscle activation than ballistic movements (American Council on Exercise).
Joint-Friendly Option
Cables put less stress on your joints compared to free weights. The smooth resistance curve works better for people with shoulder issues.
Troubleshooting Common Issues
Not Feeling It in Your Front Delts
Check your grip and arm position. Make sure you’re lifting straight forward, not out to the sides. Your thumbs should point up at the top of the movement.
Shoulder Pain During Exercise
Lower the weight and check your form. You might be lifting too high or using too much weight. Consider getting a form check from a qualified trainer.
When to Add This Exercise
Add front raises after your main pressing movements like bench press or shoulder press. Your delts are already warmed up and ready for isolation work.
This exercise works well at the end of upper body workouts. Your muscles are tired, so you don’t need heavy weight to get great results.
Conclusion
The functional trainer front raise builds strong, defined front deltoids when done with proper form. Focus on controlled movements, appropriate weight selection, and consistent training frequency. Remember to warm up properly and listen to your body throughout each session.
Start with lighter weight to master the movement pattern before progressing. Your shoulders will thank you for taking the time to learn correct form first. Consistency beats intensity every time when building lasting strength and muscle.
How heavy should I go for functional trainer front raises?
Start with 10-15 pounds per side and focus on perfect form. Add weight only when you can complete all reps with controlled movement and no momentum.
Can I do front raises every day?
No, your shoulder muscles need 48-72 hours to recover between sessions. Training every day can lead to overuse injuries and reduced performance.
Should I feel this exercise in my upper chest?
Some upper chest activation is normal since these muscles assist with forward arm movement. But the primary focus should be on your front deltoids.
What if I don’t have a functional trainer?
You can use resistance bands anchored low, dumbbells, or a single cable machine. The key is maintaining the forward lifting motion with appropriate resistance.
Is it normal for one arm to be weaker than the other?
Yes, strength imbalances between arms are common. Consider adding single-arm variations to help balance out these differences over time.