The easiest way to do a cable squat is to stand facing a low cable pulley, hold the handle, and squat down like you’re sitting in a chair. This exercise strengthens your legs and glutes effectively. We found it’s a great way to add resistance to your lower body workout.
You might be wondering how to get the most out of this exercise. Cable squats offer a controlled movement that’s easier on your joints than some other squat variations. Many experts say it helps improve your squat form too, making it a favorite for many fitness enthusiasts.
- Mastering your cable squat form.
- Adjusting the cable machine for best results.
- Understanding muscle engagement during the squat.
- Common mistakes to avoid for safety.
- Integrating cable squats into your workout routine.
Let’s walk through exactly how to set up and perform cable squats, step by step, so you can start building stronger legs and glutes today.
Mastering Your Cable Squat Form
Let’s break down the cable squat. Getting the form right is key to seeing results and staying safe. Think of it like learning to ride a bike – balance and posture are everything.
Setting Up Your Cable Machine for Squats
First things first, let’s get the machine ready. This isn’t just about grabbing a handle; it’s about optimizing your workout.
Choosing the Right Attachment
You have a few options here. We found that a straight bar or a V-bar handle works best for most people. These attachments allow for a natural grip and good balance. To ensure you have the right tools for various exercises, consider exploring the best cable attachment set for your functional trainer.
- Straight Bar: Offers a wide grip, which can feel more stable for some.
- V-Bar: Keeps your hands closer together, often preferred for a more compact feel.
- Rope Attachment: Less common for squats, but some people like the flexibility. Generally, it’s harder to maintain stability.
Adjusting Pulley Height and Weight
This part is important for targeting the right muscles. A common mistake is setting the pulley too high.
Set the pulley to the lowest possible position. This ensures the resistance pulls from below, mimicking the natural upward movement of a squat.
Start with a lighter weight than you think you need. We can’t stress this enough. It allows you to focus on your form before adding heavy resistance. You can always increase it later!
The Step-by-Step Execution of a Cable Squat
Now that your machine is ready, let’s go through the motion. Picture yourself sitting in a sturdy chair.
Starting Position
Stand facing the cable machine, about a foot or two away. Grab the handle with both hands, using an overhand grip. Your feet should be shoulder-width apart, toes pointing slightly outward (Cleveland Clinic).
Hold the handle at chest height. Keep your shoulders back and down, and your chest up. Your core should be engaged – think about bracing for a punch.
The Downward Motion (Descent)
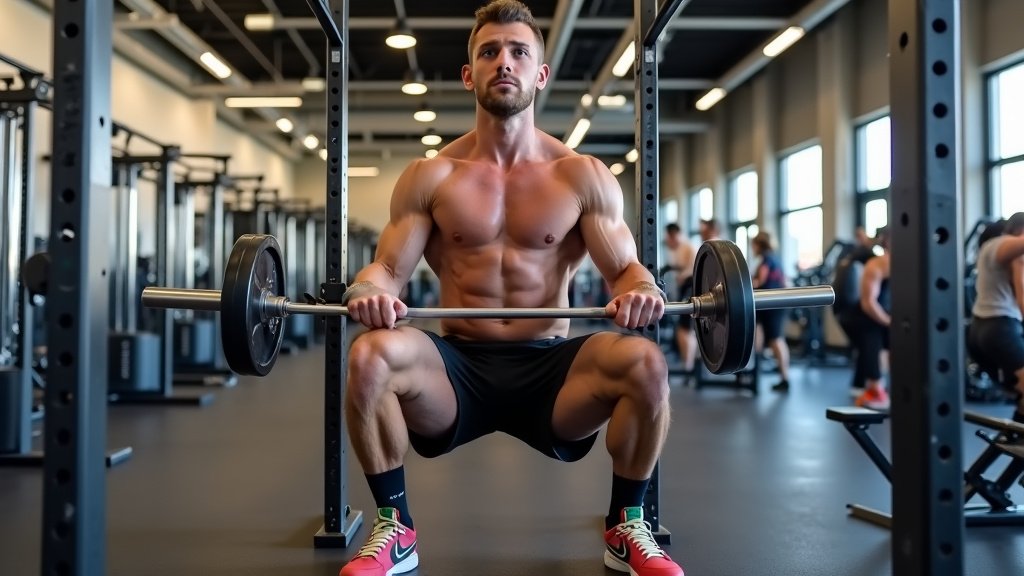
Begin to squat down by pushing your hips back. Imagine you’re trying to sit on a chair that’s just behind you. Keep your back straight, avoiding any rounding.
Lower yourself until your thighs are parallel to the floor, or as low as you can comfortably go while maintaining good form. We found that going too low with improper form can strain your back.
During the descent, the cable will pull you forward slightly. Use your core to resist this pull and keep your balance. Your knees should track over your toes, not collapse inward.
The Upward Motion (Ascent)
Push through your heels to stand back up. Drive your hips forward and squeeze your glutes at the top of the movement. This helps to fully engage your glute muscles.
Maintain control throughout the movement. Don’t let the cable machine “pull” you up too fast. This controlled movement is one of the big benefits of cable squats (American Council on Exercise).
Understanding Muscle Engagement in Cable Squats
So, what muscles are you actually working? Cable squats are great for your lower body. They effectively target major muscle groups.
Primary Muscles Targeted
Your legs and glutes do most of the heavy lifting here. We often hear people ask if it’s just a leg exercise, but it’s more comprehensive.
- Quadriceps: The front of your thighs. These muscles extend your knees.
- Hamstrings: The back of your thighs. They work with your glutes to extend your hips.
- Gluteus Maximus: Your butt muscles. These are key for hip extension and power.
Secondary and Stabilizer Muscles
Don’t forget the supporting cast! These muscles keep you steady and strong.
- Core Muscles: Your abs and lower back. They keep your torso stable and prevent rounding of the back. We found that the cable’s resistance particularly challenges your core stability.
- Calves: Though not the primary target, your calf muscles assist in stabilizing your lower leg during the movement.
- Erector Spinae: Muscles along your spine that help maintain an upright posture.
Common Mistakes to Avoid and Safety Tips
Nobody wants an injury, right? Learning from common missteps can save you a lot of trouble. We’ve seen these errors often.
Mistakes That Can Compromise Your Form
Watch out for these pitfalls. They can reduce the exercise’s effectiveness and increase injury risk.
- Rounding Your Back: This puts undue stress on your spine. Keep your chest up and core tight.
- Knees Caving In: This often happens when your glutes aren’t engaged or the weight is too heavy. Focus on pushing your knees slightly outward.
- Not Going Deep Enough: To get full muscle activation, try to reach at least parallel with your thighs. If you can’t, lighten the weight.
- Using Momentum: Don’t let the cable pull you up or down. Control the movement throughout the entire range of motion.
Safety Considerations for Cable Squats
Your well-being is paramount. A few simple rules can keep you safe.
- Start Light: We cannot emphasize this enough. Master the movement with light weight before adding more.
- Listen to Your Body: If something hurts, stop. Pushing through pain can lead to injury.
- Proper Footwear: Wear flat, stable shoes. Running shoes with soft soles can make you unstable.
- Clear the Area: Make sure there are no obstacles around you that you could trip on.
Integrating Cable Squats into Your Workout Routine
So, where do cable squats fit in your fitness journey? They’re quite versatile, actually.
Benefits of Adding Cable Squats
Why choose cable squats over other variations? They offer unique advantages.
- Consistent Tension: The cable provides constant resistance throughout the movement, unlike free weights where tension can vary. Many experts say this leads to better muscle growth.
- Improved Form: The guided path of the cable can help you maintain proper squat form, especially if you’re new to squatting.
- Joint-Friendly: Because the resistance is controlled, it can be easier on your joints than some heavy barbell squats (Mayo Clinic).
- Core Engagement: The pull from the cable significantly engages your core for stabilization.
Sample Workout Integration
Here’s how you might incorporate them. Remember, tailor this to your personal fitness level and goals.
As a Warm-Up or Activation Exercise
Use light weight and focus on form. This can prime your muscles for heavier lifts.
We found that 2-3 sets of 10-15 repetitions can be a great way to wake up your lower body.
As a Main Leg Exercise
If you’re using cable squats as a primary movement, increase the weight and focus on progressive overload.
Aim for 3-4 sets of 8-12 repetitions. This rep range is generally good for muscle hypertrophy (growth).
As a Finisher
At the end of your leg workout, use a moderate weight for higher repetitions to really burn out your muscles.
Try 2-3 sets of 15-20 repetitions, focusing on the muscle squeeze at the top.
| Exercise Focus | Sets | Reps | Weight Level |
|---|---|---|---|
| Warm-up/Activation | 2-3 | 10-15 | Light |
| Primary Strength | 3-4 | 8-12 | Moderate to Heavy |
| Endurance/Finisher | 2-3 | 15-20 | Light to Moderate |
Your Cable Squat Checklist
Before you hit the gym, here’s a quick recap to ensure you’re ready.
- Pulley at the lowest setting.
- Appropriate handle attached.
- Start with a light, manageable weight.
- Feet shoulder-width apart, toes slightly out.
- Core engaged, chest up, shoulders back.
- Push hips back, keep knees over toes.
Conclusion
You now have a complete guide to performing cable squats. We’ve covered everything from setting up the machine to integrating them into your routine. Remember, proper form and controlled movements are key to maximizing results and staying safe.
By understanding muscle engagement and avoiding common mistakes, you can genuinely improve your lower body strength. We found that cable squats offer unique benefits like consistent tension and improved form assistance. Start light, focus on technique, and progressively challenge yourself.
Your next step is to head to the gym and put this knowledge into practice. You’ve got this!
Frequently Asked Questions
Are cable squats better than free-weight squats?
Neither is inherently “better,” but they offer different advantages. Cable squats provide constant tension and guided movement, which can be great for learning form or if you have joint issues. Free-weight squats, like with a barbell, challenge your stabilizers more and allow for heavier loads.
Can cable squats help with glute growth?
Absolutely! Cable squats effectively target your glutes, especially when you focus on pushing through your heels and squeezing at the top. The constant tension from the cable can provide a strong stimulus for muscle growth in this area.
What if I don’t have a V-bar or straight bar attachment?
Most gyms will have one of these common attachments. If not, you might be able to use a D-handle, but it could feel less stable. We recommend asking gym staff if they have suitable attachments available or can suggest an alternative.
How often should I do cable squats?
This depends on your overall workout routine and goals. You could integrate them 1-3 times a week as part of your leg or full-body workouts. If you’re doing them as a primary lift, ensure you allow for adequate recovery time.
Can beginners do cable squats?
Yes, cable squats are an excellent exercise for beginners. The guided movement and consistent resistance make it easier to learn proper squat form compared to some free-weight variations. Always start with a very light weight to master the technique first.