How to Do a Cable Pallof Press?
On this page (8 sections)
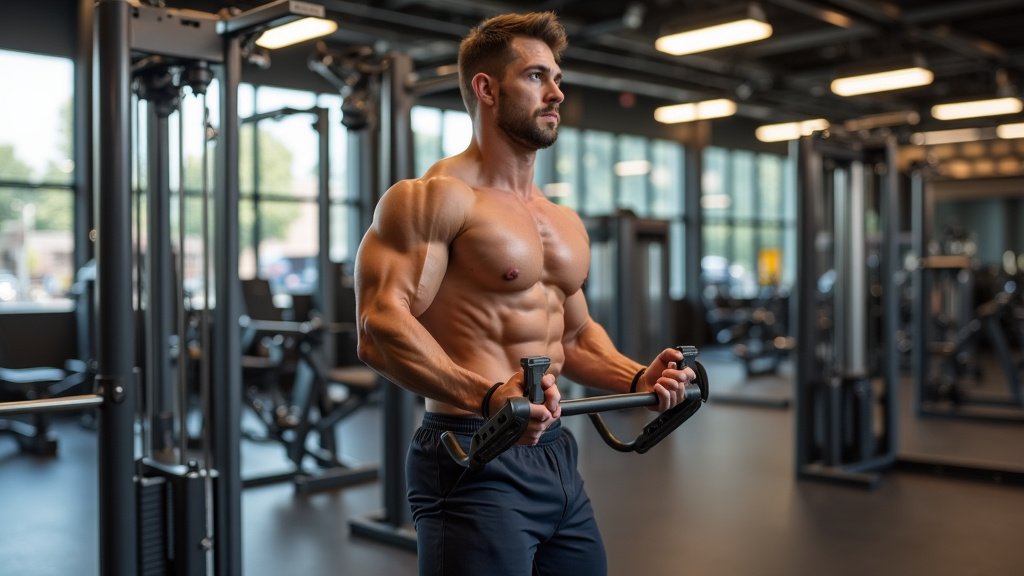
The best way to do a cable Pallof press is to stand sideways to a cable machine, grasp the handle with both hands, and press it straight out in front of you, resisting the pull. This exercise is excellent for building core strength and improving anti-rotation stability. It works by challenging your obliques to keep your torso stable against the pulling force of the cable.
Many people find that improving their core stability can help with all sorts of physical activities. A strong core can aid in lifting heavier weights, running faster, and even reducing back pain. The Pallof press, when done correctly, is a fantastic way to achieve these benefits by engaging your deep abdominal muscles and preventing unwanted twisting. It’s a functional movement that translates well to everyday life.
- The Pallof press fights rotational forces.
- It strengthens your obliques and deep core muscles.
- Focus on a slow, controlled movement.
- Proper form is key for maximum benefit.
Ready to give your core the challenge it deserves? Let’s break down exactly how to perform the cable Pallof press with perfect form, step by step.
“`htmlMastering the Cable Pallof Press for Core Stability
The cable Pallof press is a fantastic exercise for building a rock-solid core. It focuses on anti-rotation, which is vital for everyday movements and athletic performance. Let’s dive into how to perform it correctly and get the most out of this powerful move.
Setting Up Your Pallof Press Station
The setup is straightforward but crucial for maximizing the exercise’s effectiveness. You need a cable machine and a single handle attachment. This setup allows you to focus on resisting the pull.
Choosing the Right Cable Height
For a standard Pallof press, you’ll want to set the cable pulley at chest height. This position directly challenges your core to keep your torso from rotating. Some people prefer slightly lower or higher, depending on how it feels, but chest height is the most common starting point.
Selecting Your Starting Weight
When you’re first learning, start with a very light weight. The goal is to perfect your form, not to lift heavy. You should feel a noticeable pull, but not so much that you lose control of your torso. As you get stronger, you can gradually increase the weight. Many fitness professionals suggest starting with a weight you can easily manage for 10-12 repetitions with perfect form (ACE Fitness). When you’re first learning, start with a very light weight to focus on form, as beginners can use a functional trainer safely.
Grip and Stance: The Foundation of the Press
How you hold the handle and position your feet matters. A secure grip ensures you won’t drop the weight. A stable stance provides a solid base for your core to work from.
Hand Placement
Grasp the handle with both hands, palms facing each other. You can use a neutral grip, which feels like you’re holding a hammer. Some people prefer to interlace their fingers for an even firmer hold, but this is optional. The key is a comfortable and secure grip.
Foot Position and Body Alignment
Stand sideways to the cable machine. Your feet should be about shoulder-width apart. You want your body to be in a straight line from your head to your heels. Imagine a plumb line dropped from your ear, through your shoulder, hip, knee, and ankle. This alignment is essential for proper anti-rotation.
The Execution: Performing the Press
Now for the main event! This is where you engage your core and resist the cable’s pull. Focus on slow, controlled movements.
Step 1: The Initial Hold
Start with the handle close to your chest. Your elbows should be bent, and your core should be braced. This means tightening your abdominal muscles as if you were about to be lightly punched in the stomach. Take a deep breath in.
Step 2: The Press Out
As you exhale, slowly press the handle straight out in front of you. Keep your arms relatively straight, but don’t lock your elbows completely. Your palms should continue to face each other. The resistance from the cable will try to pull you towards the machine. Your job is to prevent any twisting of your torso.
Step 3: The Hold and Return
Hold the extended position for a second or two. Focus on keeping your core tight and your body stable. You should feel your obliques and deep abdominal muscles working hard. Then, slowly and with control, bring the handle back to your chest as you inhale. Resist the urge to let the weight slam back. This controlled return is just as important as the press itself.
Key Form Cues for Maximum Effectiveness
Getting the Pallof press right comes down to a few key principles. Focusing on these will ensure you’re working your core effectively and safely.
1. Brace Your Core Aggressively
This is non-negotiable. Before you press, and throughout the entire movement, your core needs to be tight and engaged. Think about drawing your belly button towards your spine without tucking your hips. This creates a rigid trunk.
2. Resist the Rotation
The cable wants to twist you. Your core muscles, especially your obliques, are responsible for stopping this. For another cable-based anti-rotation movement, follow our anti-rotation press guide. You should feel a strong tension on the side opposite the cable. Imagine you are trying to keep a rigid rod straight through your body.
3. Keep Your Shoulders Down and Back
Avoid shrugging your shoulders up towards your ears. Keep them relaxed and pulled slightly down and back. This helps maintain good posture and prevents upper back strain. Think about keeping your shoulder blades slightly squeezed together.
4. Move with Control
Never rush the movement. The Pallof press is not about speed; it’s about control and stability. Every part of the movement, from pressing out to returning, should be deliberate and slow. This allows your muscles more time under tension.
5. Maintain a Neutral Spine
Your back should remain in its natural, neutral curve. Avoid arching your lower back excessively or rounding your upper back. A stable, neutral spine is the foundation of a strong core.
Variations to Keep Things Challenging
Once you’ve mastered the basic Pallof press, you can introduce variations to further challenge your core and add variety to your training.
Half-Kneeling Pallof Press
This variation adds an extra stability challenge. Kneel on one knee, with the other foot flat on the floor in front of you. The rest of the execution is the same. This position reduces your base of support, forcing your core to work even harder.
Pallof Press with Rotation (Advanced)
This is a more advanced variation and should only be attempted once you have a solid understanding of the standard Pallof press. Start with the press out as usual, but then allow a slight, controlled rotation of your torso towards the cable as you bring the handle back to your chest. This works your core through a larger range of motion.
Standing with Feet Together
Simply standing with your feet closer together reduces your base of support, making the exercise more challenging. You’ll need to be extra vigilant about maintaining your balance and resisting rotation.
Common Mistakes to Avoid
Even with the best intentions, some common pitfalls can reduce the effectiveness of your Pallof press. Being aware of these will help you correct them.
- Letting your hips twist: Your hips should stay square to the front. If they start to rotate, the weight is too heavy, or your core isn’t braced enough.
- Arching your lower back: This often happens when you try to lift too much weight. Keep your core tight to maintain a neutral spine.
- Moving too fast: Remember, slow and controlled is the name of the game. Rushing the movement diminishes the anti-rotational benefits.
- Not bracing the core: If you don’t actively engage your abs, you’re missing the point of the exercise. It needs to be a conscious effort.
- Shrugging shoulders: Keep your upper body relaxed and your shoulders down.
Your Pallof Press Checklist for Success
Here’s a quick checklist to ensure you’re performing the cable Pallof press correctly every time:
- Cable set at chest height?
- Light weight to focus on form?
- Core braced firmly throughout?
- Body in a straight line, resisting twist?
- Movement slow and controlled?
- Shoulders relaxed and down?
Conclusion
You’ve now learned how to master the cable Pallof press, a powerful exercise for building a strong, stable core. Remember, consistent practice with proper form is key. By focusing on bracing your core, resisting rotation, and moving with control, you’ll be well on your way to improving your functional strength and reducing the risk of injury. Don’t be afraid to try the variations once you feel confident with the basics. Start incorporating this exercise into your routine consistently, and you’ll notice a difference in your overall performance and stability.
Frequently Asked Questions
How do I know if I’m using the right weight for the Pallof press?
You’ll know you’ve found the right weight if you can maintain perfect form throughout the entire set without your torso or hips twisting. If you feel your body starting to rotate, the weight is likely too heavy. Start lighter and focus on control and anti-rotation.
Can I do the Pallof press without a cable machine?
Yes, you can perform a similar anti-rotation exercise using resistance bands. Anchor the band at chest height and perform the same pressing motion, focusing on resisting the pull. The sensation might be slightly different, but the core benefits are very similar.
Why do my shoulders tend to shrug during the Pallof press?
Shoulder shrugging often happens when you’re trying to compensate for a lack of core stability or when the weight is too heavy. Actively focus on keeping your shoulders relaxed and pulled down and back. Imagine lengthening your neck away from your shoulders.
How often should I include Pallof presses in my workout routine?
For most people, performing Pallof presses 2-3 times per week is effective for building core strength. You can incorporate them at the beginning of your workout as a warm-up, or at the end as a finisher. Listen to your body and adjust as needed.
Is the Pallof press good for reducing lower back pain?
Yes, the Pallof press can be very beneficial for reducing lower back pain. By strengthening your deep core muscles and improving anti-rotational stability, it helps create a more supportive and stable trunk, which can alleviate pressure on your lower back. Yes, the Pallof press can be very beneficial for reducing lower back pain.