How to Do Cable Hip Abductions?
On this page (9 sections)
- Mastering the Cable Hip Abduction Exercise
- Setting Up for Success: Your Cable Hip Abduction Station
- The Step-by-Step Guide to Performing Cable Hip Abductions
- Common Mistakes to Avoid During Cable Hip Abductions
- Variations to Keep Your Workout Fresh
- When to Use the Cable Hip Abduction in Your Routine
- Checklist: Your Cable Hip Abduction Success Plan
- Conclusion
- Frequently Asked Questions
The cable hip abduction is a fantastic exercise for strengthening your outer hips and glutes. You can easily do cable hip abductions by attaching a strap to a low cable pulley and your ankle. This move is great for improving This article details hip abduction exercises using a functional trainer.hip stability and athletic performance.
You might be wondering how this simple movement can help. Well, it targets the gluteus medius and minimus muscles, which are key players in walking and balance. Many people find it’s a more controlled way to work these muscles compared to other exercises. It can also help reduce the risk of knee and hip pain by creating stronger hip muscles.
- Target outer hips and glutes.
- Improve hip stability and balance.
- Controlled way to work specific muscles.
- Can help reduce knee and hip pain.
Ready to add this powerful move to your routine? Let’s walk through exactly how to perform the cable hip abduction step by step.
Mastering the Cable Hip Abduction Exercise
So, you’re looking to really target those outer hip and glute muscles, huh? The cable hip abduction is a brilliant way to do it. It’s a straightforward yet effective movement that can make a real difference in your overall strength and stability.
This exercise works muscles like the gluteus medius and minimus. These muscles are super important for keeping you balanced. They help control your leg movement when you walk or run. Stronger hip abductors can also help prevent injuries in your knees and lower back. Many people find that adding this to their routine leads to better posture and fewer aches.
Setting Up for Success: Your Cable Hip Abduction Station
Before you start, let’s make sure your setup is just right. Getting this part wrong can make the exercise less effective or even cause strain. We want you feeling strong, not sore!
Choosing the Right Weight
This is where you want to be smart. The goal isn’t to lift the heaviest weight possible. You need a weight that allows you to complete the movement with good form. Start light, maybe 5-10 pounds, especially if you’re new to this. You should feel a burn in your outer hip, but not struggle to move the weight.
As you get stronger, you can gradually increase the weight. We found that most people can find a challenging yet manageable weight within a 15-30 pound range. Listen to your body. If your form breaks down, the weight is too heavy. Research suggests that focusing on controlled movements is more beneficial than lifting excessively heavy loads for muscle growth and injury prevention (American College of Sports Medicine).
Attaching the Ankle Strap
You’ll need an ankle strap attachment for the cable machine. Most gyms have these. Make sure the strap is snug but not uncomfortably tight around your ankle. You don’t want it slipping around during the exercise. It should feel secure, like a good athletic shoe.
Position the strap around the ankle of the leg you plan to work. If you’re working your right leg, the strap goes on your right ankle. Double-check that it’s centered and won’t chafe. A little bit of discomfort here can quickly turn into a distraction, or worse, an injury.
Connecting to the Cable Machine
Now, connect the ankle strap to the low pulley of the cable machine. The pulley should be set at the lowest position, right near the floor. This ensures the resistance is pulling directly away from your body, perpendicular to your leg.
The cable should be running from the front of your body to the side. You’ll be standing sideways to the machine. The weight stack should be ready to go. You’re building tension on the cable as you move away from the machine.
The Step-by-Step Guide to Performing Cable Hip Abductions
Alright, you’re set up and ready to go! Let’s break down the actual movement. Focus on each part, and you’ll be feeling the burn in no time.
Starting Position
Stand sideways to the cable machine, with the pulley on your working side. Let’s say you’re working your right leg. The cable attachment will be on your right ankle. You should be about 1-2 feet away from the machine, just enough to create slight tension on the cable when your leg is at your side.
Stand tall with your feet hip-width apart. Keep your core engaged and your shoulders pulled back. Imagine a string pulling you up from the crown of your head. Your non-working leg can be slightly in front or beside you for balance. Many find it helpful to place that foot flat on the floor for stability. You want a solid base.
The Abduction Movement: Moving Away
Begin the movement by slowly and controllably moving your working leg away from the machine. This is the abduction phase. Keep your leg mostly straight, with a very slight bend in the knee to protect the joint. Don’t lock your knee out!
Focus on using your outer hip and glute muscles to initiate the movement. Think about pushing your leg out to the side. Avoid swinging your leg or using momentum. The resistance should feel like it’s coming from your hip. Many experts suggest controlling the outward movement for about 2-3 seconds (National Academy of Sports Medicine).
Keep your torso upright. Resist the urge to lean away from the weight. Your hips should stay relatively square to the front. Imagine you’re being pulled by a rubber band attached to your ankle. The tension should be smooth and consistent.
The Return: Controlling the Descent
After you’ve moved your leg as far as is comfortable with good form, it’s time to return. Slowly and deliberately bring your working leg back to the starting position. Don’t just let the weight pull your leg back. You need to control this part of the movement just as much as the outward phase.
This eccentric (lowering) phase is just as important for muscle building. Aim to take about 3-4 seconds to bring your leg back. You’ll feel the muscles in your outer hip working hard to resist the pull of the cable. This controlled return ensures you’re getting the most out of every repetition.
Stop when your foot is back near your non-working foot, or just before it touches. You want to maintain that slight tension in the cable throughout the set. Bringing the leg all the way back and letting the weight stack drop completely can reduce the effectiveness. Keep the tension on!
Repetitions and Sets
For most people, aiming for 3-4 sets of 10-15 repetitions per leg is a great starting point. This range allows for sufficient time under tension to stimulate muscle growth and improve endurance. If you’re focusing more on stability and less on hypertrophy (muscle growth), you might do more reps with lighter weight.
Rest for about 60-90 seconds between sets. This gives your muscles enough time to recover before the next set. If you’re feeling particularly fatigued, take a little longer. Consistency is key here. You can perform this exercise 2-3 times per week, allowing for rest days in between for muscle repair and growth.
Common Mistakes to Avoid During Cable Hip Abductions
Even with a simple exercise, it’s easy to make mistakes that can reduce its effectiveness or even lead to injury. Let’s look at a few common pitfalls.
Swinging and Momentum
The biggest mistake is using your body to swing the weight. You might find yourself rocking your torso or using a sudden burst of energy to move the leg. This takes the work away from your target muscles.
Remember, this is a controlled movement. If you’re swinging, the weight is likely too heavy. Slow down and focus on the contraction in your outer hip. Research highlights that controlled movements with lighter weights can be more effective for muscle activation than heavy, fast movements (Journal of Strength and Conditioning Research).
Leaning the Torso
As you abduct your leg, it’s tempting to lean your torso away from the machine to compensate for the resistance. This shifts the stress away from your hips and onto your lower back. Keep your body upright and stable.
Engage your core muscles. Think about keeping your hips pointing forward as much as possible. Imagine you have a table in front of you and your hips are resting on it; try to keep those hips level and square.
Hyperextending the Knee or Hip
Some people tend to hyperextend their knee or hip at the end range of motion. This can put unnecessary strain on your joints. You want a slight bend in your knee throughout the movement.
Focus on the range of motion that feels comfortable and controlled. Pushing too far can lead to injury. It’s better to have a slightly shorter range of motion with perfect form than a full range with poor form.
Not Controlling the Return
We touched on this, but it’s worth repeating. The way you bring your leg back is just as important as how you move it away. Letting the cable yank your leg back means you’re missing out on a great opportunity to build strength.
Actively resist the pull of the cable on the way back. Feel your muscles working to control the descent. This slower, controlled return is where a lot of the magic happens for muscle development.
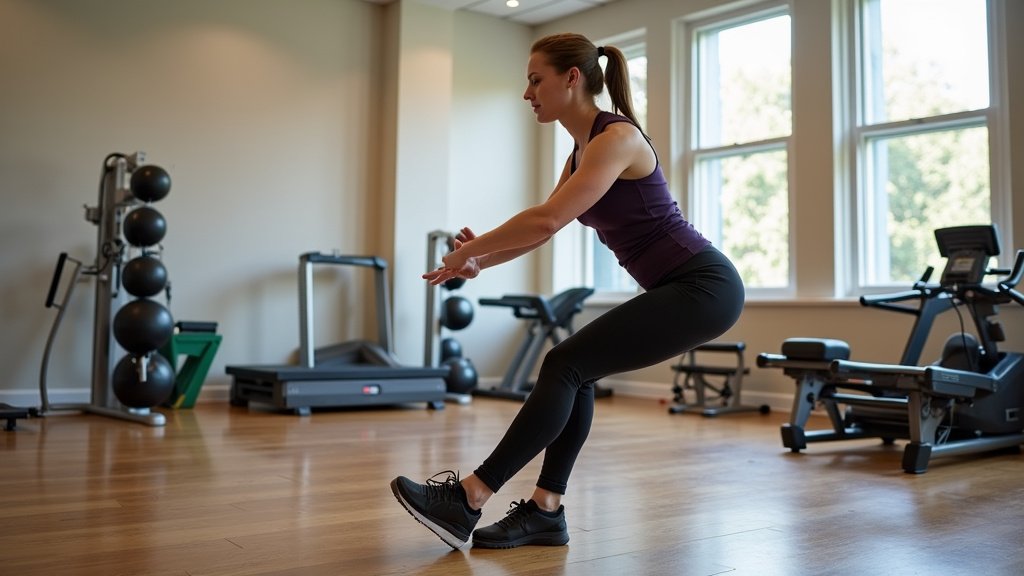
Variations to Keep Your Workout Fresh
Once you’ve mastered the basic cable hip abduction, you might want to switch things up. Here are a couple of ways to add a little variety.
Standing with the Cable in Front
Instead of standing sideways, try standing with the cable in front of you. Attach the strap to the ankle farthest from the machine. You’ll then move your leg across your body and out to the side, working slightly different fibers of the gluteus medius.
Lying Down Variations
While not a cable exercise, lying side leg raises can mimic the motion. You can also use a cable with a strap attached to your ankle while lying on your side. This can offer a different feel and stability challenge.
When to Use the Cable Hip Abduction in Your Routine
So, when does this exercise fit best? It’s pretty versatile!
- Warm-up: Use it as part of your warm-up to activate your hip muscles before squats or lunges.
- Glute-focused day: It’s perfect for a glute or leg day when you want to isolate the outer hip area.
- Rehab/Prehab: If you have any hip or knee instability, it’s a great tool for strengthening supporting muscles, often recommended by physical therapists (Mayo Clinic).
- Accessory Exercise: Add it after your main compound lifts to give those smaller stabilizing muscles some extra attention.
Checklist: Your Cable Hip Abduction Success Plan
Here’s a quick checklist to ensure you’re performing the cable hip abduction correctly:
- Ensure the cable is at the lowest pulley setting.
- Attach the ankle strap snugly but comfortably.
- Stand tall with your core engaged.
- Move your leg away slowly and with control.
- Resist the pull on the way back to the start.
- Maintain a slight bend in your working knee.
Conclusion
You’ve now got the roadmap to mastering the cable hip abduction. Remember, this exercise is a powerful tool for building stronger outer hips and glutes, which directly impacts your stability and can help prevent pain. Focus on controlled movements, proper setup, and consistent practice. Your body will thank you for the attention you give to these often-underworked muscles. So, next time you’re in the gym, don’t skip this exercise – your hips will feel the difference!
Frequently Asked Questions
How much weight should I use for cable hip abductions?
Start with a lighter weight, around 5-15 pounds, to ensure you can maintain good form. You should feel a burn in your outer hip, not struggle to move the weight. As you get stronger, gradually increase the weight, aiming for a range where 10-15 reps are challenging but still allow for controlled movement.
Can cable hip abductions really help with knee pain?
Yes, they can be very helpful. Strengthening your gluteus medius and minimus muscles, which cable hip abductions target, improves hip stability. Better hip stability can help correct imbalances that often contribute to knee pain, especially during activities like running or squatting.
What’s the difference between standing sideways and standing in front for cable hip abductions?
Standing sideways primarily targets the gluteus medius and minimus in their primary role of hip abduction. For the opposite movement, see this guide to hip adduction form. Standing with the cable in front and moving the leg across the body works slightly different fibers of these muscles and can challenge your balance differently, providing a varied stimulus.
Why is it important to control the return movement?
The eccentric phase, or the controlled return of the weight, is just as important for muscle growth and strength as the lifting phase. Allowing the weight to simply snap back wastes a prime opportunity to build muscle and can put undue stress on your joints. Actively resisting the pull creates more tension and time under load.
Can I do cable hip abductions if I don’t have a cable machine?
While the cable machine offers consistent tension, you can mimic the movement with resistance bands or even light dumbbells. For bands, you can loop one around your ankles and perform leg raises, or attach it to a stable object and your ankle. Lying side leg raises are another effective bodyweight alternative.