How to Do Single Arm Rows on a Cable Machine?
On this page (8 sections)
To do single arm rows on a cable machine, you’ll want to start by adjusting the pulley to a low position. Stand with your feet staggered, grasping the handle with the hand farthest from the machine. Pull the handle towards your torso, focusing on squeezing your back muscles. This exercise is fantastic for building back strength and improving posture.
Cable machine rows are a super effective way to target specific back muscles. For setup and form details, see this single arm cable row guide. The single-arm variation allows for a greater range of motion. This helps you feel the contraction more intensely. Many people find it easier to focus on form with this unilateral movement, leading to better muscle activation.
- Proper setup is key.
- Focus on the squeeze.
- Control the negative (lowering).
- Listen to your body.
- Adjust weight as needed.
Ready to sculpt your back? Let’s walk through exactly how to perform the single arm cable row step by step.
Mastering the Single Arm Cable Row for a Stronger Back
Ready to build a powerful and sculpted back? The single arm cable row is a fantastic exercise for targeting your lats and rhomboids. It also helps improve your posture. This movement allows for a great range of motion. You can really focus on the squeeze. We’ll guide you through setting up and executing this exercise perfectly. Let’s get started!
Setting Up Your Single Arm Cable Row Station
Proper setup is the foundation of any good exercise. For single arm cable rows, the pulley height is your first key decision. Getting this right ensures you hit the target muscles effectively. It also helps prevent strain on other areas.
Choosing the Right Pulley Height
You’ll want to set the pulley to a low position. This means the cable should be near the floor. Think about where the handle will end up during the movement. For rows, the cable should be roughly at shin or ankle level when you’re in your starting position. This low anchor point allows your arm to travel upward at an angle that targets your back muscles effectively. It mimics the pull of a dumbbell row but with constant tension from the cable. If the pulley is too high, you’ll end up pulling across your body. This shifts the emphasis away from your back muscles. It can also put unnecessary stress on your shoulder joint.
Selecting Your Handle Attachment
For a single arm row, a D-handle or a stirrup handle is usually your best bet. These attachments are designed for this type of unilateral pulling motion. They allow for a natural grip. The D-handle lets you grip it with your palm facing inward. The stirrup handle offers a more neutral grip. Both are good options. It really comes down to personal preference and what feels most comfortable in your hand. Make sure the attachment is securely clipped to the cable.
Choosing Your Starting Weight
Starting weight is important. You don’t want it too heavy. You also don’t want it too light. For single arm rows, aim for a weight that challenges you. You should be able to complete your target repetitions with good form. Many fitness professionals suggest starting with a weight you can lift for 10-15 repetitions. If you can easily do more, it’s too light. If you struggle to hit 8 reps with good form, it’s too heavy. It’s always better to start lighter and increase gradually. This prevents injury and ensures better muscle engagement. You can always add more weight as you get stronger.
Executing the Perfect Single Arm Cable Row
Now that your station is set, let’s focus on the movement itself. Your form is absolutely critical for maximizing results and staying safe. We’ll break down each part of the exercise.
The Starting Stance: Finding Your Balance
Stand facing the cable machine. Place the weight stack at your chosen resistance. Take a step back to create tension in the cable. Your feet should be about shoulder-width apart. A staggered stance is often recommended for single arm rows. Place one foot slightly forward and the other back. This provides a more stable base. Your front knee should be slightly bent. Your back knee should be softly bent as well. Hinge slightly at your hips. Keep your back straight and your core engaged. Imagine a straight line from your head to your tailbone. Avoid rounding your back at all costs. This stance helps you maintain balance and control throughout the movement.
The Grip: Secure and Ready
Reach down and grasp the handle with the hand that is farthest from the machine. For example, if you’re standing to the left of the machine, you’ll use your right hand. Your palm should be facing your body, or in a neutral position. Keep a firm but not overly tight grip. You don’t want to waste energy clenching too hard. Let your arm hang straight down towards the floor. Your shoulder should be relaxed, not shrugged up towards your ear. You should feel a slight stretch in your lat muscle.
The Pull: Engaging Your Back Muscles
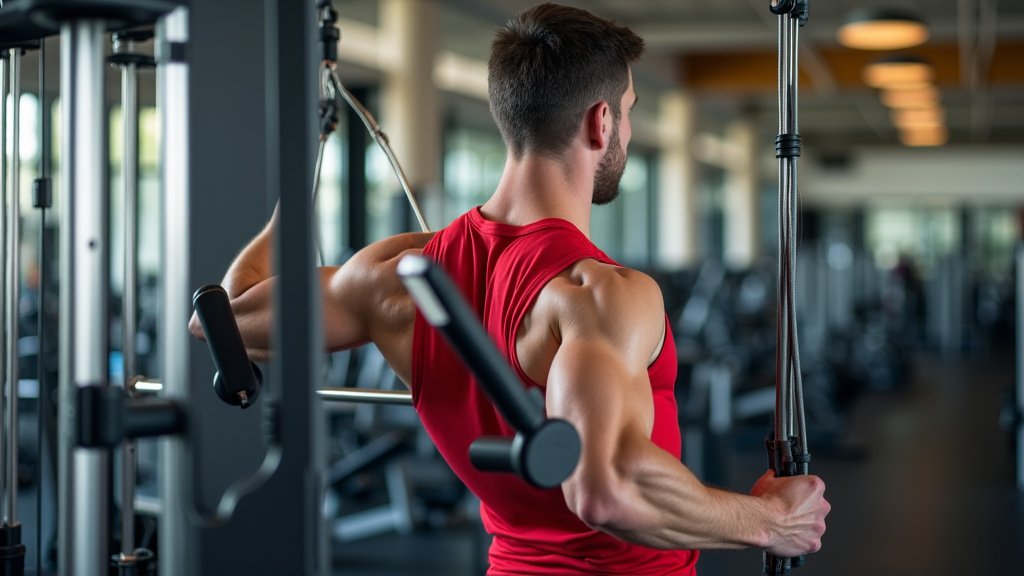
This is where the magic happens! Begin the pull by driving your elbow back towards your torso. Focus on using your back muscles to initiate the movement. Think about pulling with your elbow, not just your hand. As you pull, squeeze your shoulder blade towards your spine. Imagine you’re trying to pinch a pencil between your shoulder blades. Keep your torso relatively stable. Avoid twisting your body excessively. Your chest should remain proud, and your core tight. Pull the handle towards your midsection, typically around your rib cage. Your elbow should stay tucked close to your body. At the peak of the movement, you should feel a strong contraction in your lat and rhomboid muscles. Hold this squeezed position for a brief moment.
The Release: Controlling the Descent
After you’ve squeezed your back muscles, it’s time for the return phase. This is often called the “negative” or “eccentric” part of the lift. Control the movement as you slowly extend your arm back to the starting position. Don’t just let the weight pull you back. Resist the pull. Allow your lat muscle to stretch. Maintain good posture throughout. You should feel a stretch in your back as your arm extends. The descent should be slower than the pulling phase. A common guideline is to make the lowering phase about twice as long as the pulling phase. This controlled eccentric movement is very important for muscle growth.
Common Mistakes to Avoid
Even with good intentions, it’s easy to fall into common traps. Being aware of these can help you perfect your technique and get the most out of every rep. Let’s look at what to watch out for.
Don’t Let Your Torso Swing
One of the most frequent errors is using momentum. This means swinging your upper body to help pull the weight. This takes the focus off your back muscles. It also increases your risk of injury. Keep your core braced and your torso as still as possible. If you find yourself swinging, the weight is likely too heavy. Reduce the load and focus on controlled movement. Your back should be doing the work, not your momentum.
Avoid Shrugging Your Shoulders
As mentioned earlier, keep your shoulder down. Shrugging your shoulder up towards your ear is a sign you’re not isolating your back muscles. It also puts unnecessary tension on your neck and upper traps. Imagine keeping your shoulder blade depressed (pulled down) throughout the entire movement. This helps ensure you’re engaging the lats effectively.
Don’t Let the Weight Drop
Releasing the weight too quickly on the eccentric phase is another common mistake. The controlled lowering is just as important as the pull. It builds strength and muscle. It also improves your body’s ability to handle heavier loads safely. Focus on that slow, controlled release. Feel the stretch in your back.
Maximizing Your Single Arm Cable Rows
Want to take your single arm cable rows to the next level? For more on cable renegade rows, see this guide. A few simple adjustments can make a big difference. Let’s explore some ways to get even more from this exercise.
Focus on the Mind-Muscle Connection
This is more than just moving weight. It’s about really feeling the muscles working. Before you start your set, think about your lats and rhomboids. As you pull, concentrate on contracting those muscles. Imagine them getting stronger with each rep. This mental focus can significantly enhance muscle activation. Many athletes find this connection improves their overall results.
Experiment with Grip Variations
While the D-handle is standard, you might find other attachments helpful. A rope attachment can allow for a slightly different feel. It can also work your forearms differently. Try a neutral grip if available. Sometimes, just changing the grip slightly can help you target different fibers. Always prioritize comfort and proper form, though.
Incorporate into Your Routine
Single arm cable rows are excellent as part of a broader back workout. For more on cable upright rows, see this guide. They can be used for strength building, muscle hypertrophy, or even as a finishing exercise. They pair well with other pulling movements like lat pulldowns or face pulls. Don’t forget about consistency. Aim to perform them regularly for the best outcomes. Based on general fitness guidelines, training major muscle groups 2-3 times per week can be effective for most individuals (CDC).
Your Single Arm Cable Row Checklist
Before you jump into your next set, quickly run through this checklist. It’s a great way to ensure you’re set up for success:
- Pulley set to a low position?
- Using a comfortable handle attachment?
- Weight selected for 10-15 reps with good form?
- Feet stable, staggered stance?
- Back straight, core engaged?
- Controlled pull and slow release?
Conclusion
You’ve learned how to master the single arm cable row, a powerful exercise for building a strong and well-defined back. For more on single arm cable pulldowns, see this guide. Remember, proper setup and controlled movement are your greatest allies. By focusing on the squeeze and the slow release, you’ll maximize muscle activation and minimize injury risk. Don’t forget to keep your torso stable and avoid common mistakes like swinging or shrugging. Ready to feel the difference? Your next step is to incorporate these precise movements into your next back workout and focus on that mind-muscle connection.
Frequently Asked Questions
How often should I do single arm cable rows?
For most people, aiming to perform single arm cable rows 2-3 times per week is effective for building strength and muscle. Allow at least one rest day between training sessions for your back muscles to recover and grow.
What’s the difference between single arm and double arm cable rows?
Single arm cable rows allow for a greater range of motion and a more focused contraction on each side of your back. They also help identify and correct muscular imbalances between your left and right sides.
Can I use a straight bar attachment for single arm rows?
While you can technically use a straight bar, a D-handle or stirrup attachment is generally preferred for single arm rows. These allow for a more natural grip and better isolation of the back muscles.
My lower back hurts during single arm cable rows. What am I doing wrong?
If your lower back is hurting, you’re likely not keeping your core engaged or your back straight. Ensure you maintain a neutral spine and hinge at your hips, not round your back. The weight might also be too heavy.
How do I know if I’m using the right weight for single arm cable rows?
You’ve found the right weight if you can complete 10-15 repetitions with excellent form. If you can easily do more than 15, the weight is too light. If you struggle to reach 8 reps with good form, it’s too heavy.