Assisted dips using a functional trainer provide perfect support for beginners or anyone struggling with traditional dips. The machine’s adjustable counterweight system lets you control exactly how much assistance you need.
You’ll build chest, triceps, and shoulder strength faster with proper form rather than struggling through incomplete reps on parallel bars.
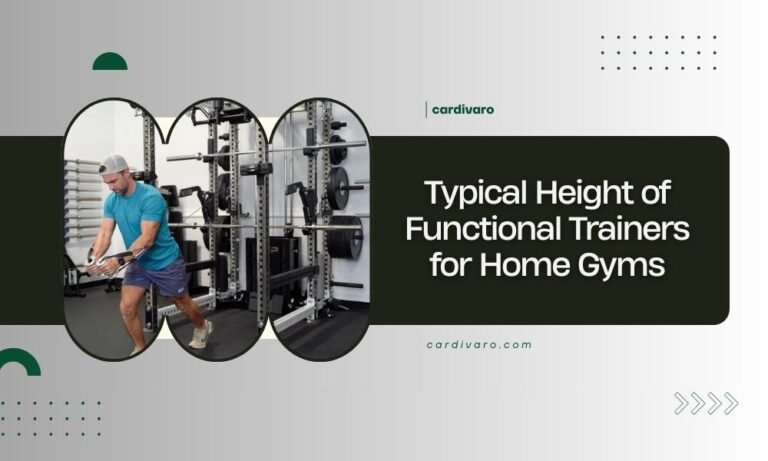
What Are Assisted Dips on a Functional Trainer
Think of assisted dips as training wheels for your upper body. The functional trainer’s cable system supports part of your body weight while you focus on perfect movement patterns.
You grip the handles and lower yourself down just like regular dips. But here’s the difference – the machine helps lift you back up. This support lets you complete full range-of-motion reps even if you can’t do bodyweight dips yet.
How the Machine Works
The functional trainer uses a weight stack connected to cables. When you select assistance weight, that amount gets subtracted from your body weight.
For example, if you weigh 150 pounds and select 50 pounds of assistance, you’re only lifting 100 pounds during the movement.
Setting Up Your Assisted Dip Station
Getting your setup right makes all the difference. I found that most people rush this part and end up with poor form or discomfort.
Adjusting the Cable Height
Set both cables to chest height or slightly lower. The handles should meet you naturally when you’re in the starting position.
Too high and you’ll feel pulled upward. Too low creates awkward arm angles.
Selecting Your Weight
Start with 30-50% of your body weight as assistance. This gives you enough support to focus on form while still working your muscles.
You can always adjust between sets. Better to start with too much help than too little.
Weight Selection Guide
| Your Body Weight | Starting Assistance | Goal Reps |
|---|---|---|
| 120-140 lbs | 40-60 lbs | 8-12 |
| 150-170 lbs | 50-70 lbs | 8-12 |
| 180-200 lbs | 60-80 lbs | 8-12 |
Perfect Form Step-by-Step
Research from exercise science shows that controlled movement beats rushed reps every time (ACSM). Here’s how to nail your technique.
Starting Position
Grab the handles with palms facing down. Your arms should be fully extended, supporting your body weight.
Keep your torso upright and core tight. Think “proud chest” position.
The Descent
Lower yourself by bending your elbows. Keep them close to your sides, not flaring out wide.
Go down until your shoulders are slightly below your elbows. This full range builds the most strength.
Common Descent Mistakes
- Leaning too far forward – keeps your chest up
- Dropping too fast – control the movement
- Stopping too high – get that full stretch
The Push-Up Phase
Press yourself back up smoothly. The machine assists, but you still need to push.
Focus on squeezing your chest and triceps as you rise. Don’t just let the cables do all the work.
Muscles Worked During Assisted Dips
You’re hitting multiple muscle groups with every rep. That’s why dips are called the “upper body squat.”
Primary Muscles
Your chest does most of the heavy lifting, especially the lower portion. Your triceps kick in hard during the pushing phase.
The front of your shoulders (anterior deltoids) also work throughout the entire movement.
Supporting Muscles
Your core stays engaged to keep you stable. Your back muscles help maintain good posture.
Even your legs get involved as they help control your body position.
Programming Your Assisted Dip Workouts
I researched various training approaches and found that consistency beats intensity for beginners.
Beginner Protocol
Start with 2-3 sessions per week. Do 3 sets of 8-12 reps with 60-90 seconds rest between sets.
Focus on perfect form over rep count. Quality reps build strength faster than sloppy ones.
Week-by-Week Progression
Week 1-2: Learn the movement, find your assistance weight
Week 3-4: Add 1-2 reps per set
Week 5-6: Reduce assistance by 5-10 pounds
Week 7-8: Continue reducing assistance as you get stronger
Intermediate Approach
Once you can do 12+ reps easily, it’s time to progress. You have two good options.
Option one: Keep reducing assistance until you’re doing bodyweight dips. Option two: Add weight to increase difficulty.
Troubleshooting Common Issues
Every exercise has its quirks. Here are the problems I hear about most often.
Shoulder Pain or Discomfort
Usually means you’re going too deep or your form is off. Stop the movement when you feel a good stretch, not pain.
Mayo Clinic guidelines suggest backing off if you feel sharp pain in joints during exercise.
Quick Fixes for Shoulder Issues
- Warm up with arm circles and shoulder rolls
- Don’t go below a 90-degree elbow bend
- Keep your shoulders down, not hunched up
Not Feeling It in Your Chest
This often happens when people lean too far forward or backward. Keep your torso upright with a slight forward lean.
Try squeezing your chest muscles at the top of each rep. This mind-muscle connection helps a lot.
Benefits Over Other Chest Exercises
Assisted dips offer unique advantages compared to push-ups or bench press.
Better Range of Motion
You can stretch your chest deeper than most other exercises. This fuller range builds more muscle and flexibility.
Research shows that full range-of-motion exercises produce better strength gains (NCBI).
Functional Movement Pattern
Dips mimic real-world pushing motions. Getting up from a chair or pushing yourself up from the ground uses similar muscles.
This carries over to daily activities better than isolation exercises.
Safety Tips and Precautions
Smart training prevents injuries and keeps you consistent.
Listen to Your Body
Some muscle fatigue is normal. Joint pain is not. Know the difference and act accordingly.
If something feels wrong, stop and reassess your form or assistance level.
Red Flags to Watch For
- Sharp pain in shoulders, elbows, or wrists
- Numbness or tingling in your arms
- Inability to maintain good form
Conclusion
Assisted dips using a functional trainer give you the perfect stepping stone to build serious upper body strength. You’ll develop your chest, triceps, and shoulders while learning proper movement patterns that transfer to everyday activities. Start with enough assistance to maintain good form, focus on controlled movements, and gradually reduce the help as you get stronger. With consistent practice, you’ll soon graduate to bodyweight dips and beyond. Remember, every rep counts when you do it right.
Can I do assisted dips every day?
Your muscles need 48-72 hours to recover between intense sessions. Stick to every other day or 3 times per week maximum. You can do light movement or stretching on off days.
How long before I can do unassisted dips?
Most people progress to bodyweight dips within 6-12 weeks of consistent training. Your timeline depends on starting strength, body weight, and how often you practice. Be patient and trust the process.
Should I feel sore after assisted dips?
Mild muscle soreness 24-48 hours later is normal, especially when starting. Sharp pain during the exercise or severe soreness that lasts more than 3 days means you may have overdone it.
What if my gym doesn’t have a functional trainer?
Look for an assisted dip machine or resistance bands. You can also have a partner hold your feet to provide assistance, though this is less precise than machine-assisted versions.
Is there a weight limit for assisted dips?
Most functional trainers handle users up to 300-400 pounds, but check your specific machine’s rating. The assistance weight stack typically goes up to 150-200 pounds, which covers most users’ needs.