How Long Does It Take to Assemble a Functional Trainer?
On this page (6 sections)
Assembling a functional trainer typically takes anywhere from 2 to 6 hours. The exact time depends on the specific model and your assembly experience. Many users report it’s a manageable DIY project with the right tools.
You might be surprised how quickly you can get your new home gym equipment ready. We found that having a helper can significantly speed up the process. Patience and following the instructions carefully are also key to a smooth setup.
- Most functional trainers take 2-6 hours to assemble.
- Having a second person helps a lot.
- Read the manual thoroughly before starting.
- Organize all parts first to save time.
- Don’t rush; take your time for safety.
Ready to get your functional trainer built and start your workouts? Let’s walk through what you can expect during the assembly process.
Factors Influencing Your Functional Trainer Assembly Time
Assembling a functional trainer is a journey, not a race. The time it takes truly depends on a few key elements. We’ve found that the complexity of the model and whether you have a helping hand are big factors.
Understanding Model Complexity and Design
Not all functional trainers are created equal. Some models are surprisingly simple, with fewer parts and a more straightforward build. If assembly is a priority, compare the easiest trainers to assemble. Others are like puzzles with many pieces, cables, and pulleys.
Compact vs. Commercial-Grade Functional Trainers
Think about the difference between a small bookcase and a custom entertainment center. A compact functional trainer, designed for smaller spaces, often has a simpler frame and fewer weight stack components. These might take you closer to the 2-3 hour mark.
Commercial-grade functional trainers, on the other hand, are built for heavy use. They feature more robust frames, heavier weight stacks, and often more intricate cable routing systems. These behemoths can easily push assembly times towards the 5-6 hour range, especially if you’re working alone.
We’ve seen that models with pre-assembled sections can save you significant time. Look for that detail when you’re making your purchase decision.
Your Personal Experience and Tool Arsenal
Are you a seasoned DIY enthusiast or someone who rarely picks up a wrench? Your comfort level with tools and following diagrams plays a big role. But don’t worry, even beginners can succeed with a bit of patience!
The Right Tools for the Job
Having the correct tools on hand is like having the right ingredients for a recipe. Most functional trainers come with basic tools, but we’ve found that your own set of quality wrenches and a socket set can make a world of difference. A power drill with the right bits can also speed up certain steps, but be careful not to overtighten anything!
- Ratchet and socket set (metric)
- Adjustable wrench
- Rubber mallet
- Measuring tape
- Level
- Box cutter or scissors (for packaging)
- Work gloves (optional, but recommended)
A good headlamp can also be surprisingly useful, especially if you’re working in a dimly lit garage or basement. And don’t forget a comfortable, sturdy surface to work on.
The Indispensable Role of a Helper
Can you assemble a functional trainer by yourself? Absolutely! Is it easier and faster with a second person? Unequivocally, yes! Many experts say a second pair of hands can cut your assembly time by 25-40%.
Imagine trying to hold a heavy upright column in place while also trying to align bolts. It’s a two-person job for safety and efficiency. A helper can pass you tools, hold parts steady, or simply offer moral support (and maybe a snack!).
Preparing for a Smooth Functional Trainer Build
Before you even open the box, a little preparation can save you a lot of headaches. Think of it as stretching before a workout – it primes you for success and helps prevent injury (or frustration!).
Clearing Your Workspace
You’ll need more space than you think. Functional trainers, even compact ones, have large components. We suggest clearing an area that’s at least twice the footprint of the assembled machine. This gives you room to lay out parts, move around comfortably, and prevent tripping hazards.
Ensure the area is well-lit and on a stable, level surface. If you’re building it on carpet, you might want a piece of plywood or cardboard to protect the floor from potential scratches or dents from heavy parts.
Organizing and Inventorying All Parts
This step might seem tedious, but it’s a critical time-saver. Open all the boxes and carefully lay out every single part. Group similar items together – all the bolts here, all the washers there, all the frame pieces in another spot. Check them against the parts list in your manual. Why is this so important?
We’ve found that missing a single small washer halfway through the build can bring the whole process to a screeching halt. Identifying any missing or damaged parts upfront allows you to contact customer service before you’re deep into assembly. This proactive approach saves you immense frustration (National Institutes of Health).
You can even use small bowls or containers to hold different types of hardware. Labeling them can be a super-efficient trick.
Mastering the Manual: Your Assembly Blueprint
Consider the instruction manual your functional trainer’s personal “how-to” guide. This functional trainer assembly guide can also help you prepare. Don’t just glance at it; read it thoroughly from cover to cover before you start. Many manuals include helpful tips, safety warnings, and visual aids that can prevent common mistakes.
Pay close attention to diagrams. Sometimes, a tiny arrow or a specific orientation is crucial for proper assembly. We’ve seen that understanding the overall sequence of steps makes the actual building process much smoother. It’s like having a map before you start your road trip.
The Assembly Process: What to Expect During the Build
Now that you’re prepared, let’s look at the typical stages of functional trainer assembly. Knowing what’s coming can help you pace yourself and avoid feeling overwhelmed.
Stage 1: Building the Base and Frame
This is often the first major step. You’ll typically start by connecting the various base sections and upright columns. These pieces are usually the heaviest and can be awkward to maneuver alone. This is where your helper truly shines.
Ensure all connections are secure but don’t fully tighten bolts until instructed. Many functional trainer designs require a bit of wiggle room to align subsequent pieces correctly. You’ll often go back and tighten everything at the end (Mayo Clinic).
Stage 2: Installing Weight Stacks and Pulleys
Once the frame is stable, you’ll likely move on to the weight stacks. This can be a labor-intensive part of the build, as individual weight plates are heavy. Take your time and be careful not to pinch your fingers. Proper alignment of the guide rods is crucial for smooth weight movement.
Next come the pulleys. These need to be installed in the correct orientation and often require a specific routing of the cables. This is where those diagrams in your manual become your best friend. Incorrect cable routing can lead to friction, wear, and improper function.
Stage 3: Attaching Cables and Accessories
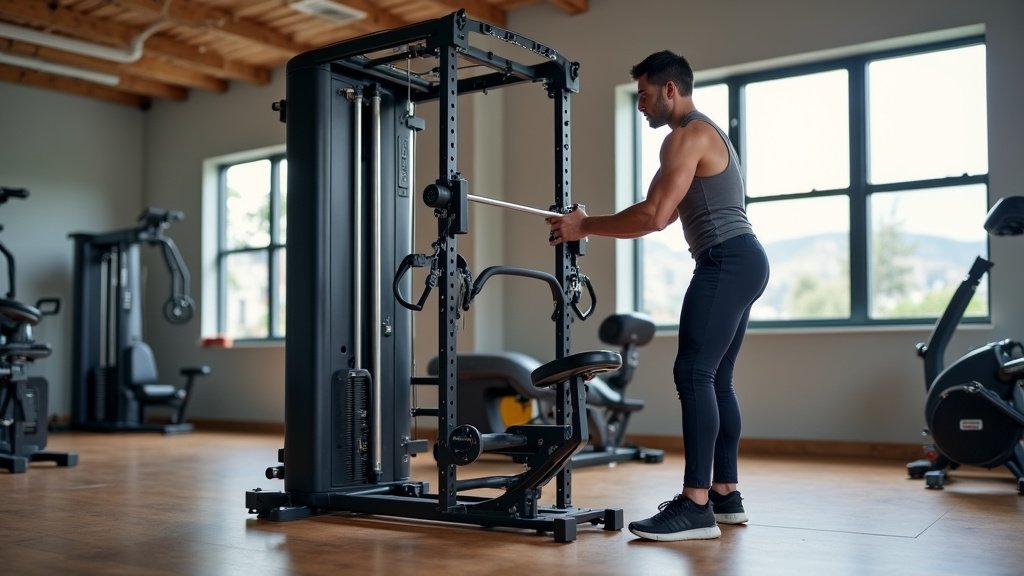
The cable system is the heart of your functional trainer. You’ll carefully attach the cables to the weight stacks, thread them through the pulley system, and connect them to the various attachment points. This stage demands precision.
Many cables have specific tension requirements or connection methods. Check the functional trainer warranty terms before making adjustments. Again, refer to your manual for exact instructions. Finally, you’ll attach any remaining accessories like handles, footrests, or storage pegs. Give everything a final check to ensure it’s secure.
Post-Assembly Checklist and First Use
You’re almost there! Before you jump into your first workout, a quick once-over can ensure everything is safe and sound. Think of it as a pre-flight check for your new fitness machine.
Performing a Safety and Functionality Check
This is arguably the most important step after assembly. Don’t skip it! We’ve put together a quick checklist to guide you:
- Tighten All Bolts: Go back through every connection point and ensure all bolts, nuts, and screws are fully tightened.
- Test Cable Movement: Manually pull each cable through its full range of motion. Listen for any rubbing or strange noises.
- Check Pulley Smoothness: Observe how the pulleys move. They should rotate freely without sticking.
- Inspect Weight Stack: Lift and lower the weight stack several times. It should move smoothly up and down the guide rods.
- Verify Attachment Points: Ensure all handles and accessories attach securely to the cables and frame.
- Clear Surroundings: Make sure there are no tools, packaging, or other obstacles around the machine.
If anything feels off or looks incorrect, consult your manual again. It’s always better to double-check now than to discover an issue during your workout.
Your First Workout: Start Light
When you’re finally ready to use your functional trainer, we recommend starting with very light weights. This isn’t just about easing into your workout; it’s also a final test of the machine’s functionality under load.
Perform a few slow, controlled movements with minimal resistance. This allows you to feel how the cables move, ensure there’s no unexpected friction, and confirm that everything is stable. Think of it as a warm-up for both you and your new equipment!
Congratulations! You’ve successfully assembled your functional trainer. Now, go enjoy those versatile workouts you’ve been dreaming of!
Conclusion
You’ve seen that assembling a functional trainer is a rewarding project, often taking 2 to 6 hours. Your model’s complexity, your tools, and having a helper all play a big part in that timeline. We found that proper preparation—clearing your space and organizing parts—is just as important as the actual build.
By following your manual and performing a thorough safety check, you’re not just building equipment; you’re building confidence. Now, take that final step: enjoy your versatile new functional trainer and crush your fitness goals!
Frequently Asked Questions
Can I assemble a functional trainer by myself?
Yes, you can definitely assemble a functional trainer alone. It will likely take longer, especially with heavier components. Many people find it more manageable and faster with a second pair of hands.
What if parts are missing from the box?
If you find missing parts during inventory, stop assembly immediately. Contact the manufacturer’s customer service with your model number and a list of the missing items. They can send replacements, which might delay your build slightly.
Do I need special electrical wiring for a functional trainer?
Most standard functional trainers are purely mechanical and do not require any special electrical wiring. Some advanced models with digital consoles might need a standard wall outlet. Always check your specific product manual.
How do I maintain my functional trainer after assembly?
Regular maintenance includes wiping down the frame, checking cable tension, and lubricating guide rods if recommended by the manufacturer. Periodically inspect all bolts to ensure they remain tight. This keeps your machine running smoothly for years.
Can I disassemble and move my functional trainer easily?
Disassembling a functional trainer is usually possible but can be as time-consuming as the initial assembly. We recommend keeping your manual for reassembly instructions. For moving, it’s often easier to partially disassemble heavy sections rather than fully break it down.