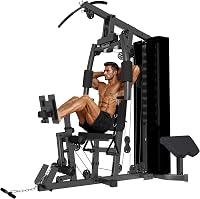
How to Disassemble a Centr 3 Functional Trainer for Moving
For Centr 3 functional trainer disassembly for moving, use the manual for your exact model, unload the weight stacks, and photograph connections before removing parts. Label hardware by section, protect cables, and get help with heavy or unclear assemblies.
On this page (9 sections)
- What should you do before Centr 3 disassembly for moving?
- How do you make the trainer safe to take apart?
- Which Centr 3 parts should you remove first?
- How should you label cables, bolts, and frame sections?
- How do you pack the trainer for transport?
- How can you avoid common disassembly mistakes?
- What should you check before loading the trainer?
- How do you reassemble the Centr 3 after the move?
- When should you get help with a Centr 3 move?
For Centr 3 functional trainer disassembly for moving, follow the manual for your exact model, unload the weight stacks, and document every connection before removing parts. Label hardware by section and protect cables, pulleys, and frame surfaces during transport.
A functional trainer's cable path and weight-stack assembly need careful handling. If the manual is missing or a step is unclear, pause and ask Centr support rather than guessing at a connection.
What should you do before Centr 3 disassembly for moving?
Prepare the route, tools, labels, and help before loosening the frame. Check the manual for your exact Centr 3 model and use its sequence, tool guidance, and lifting instructions.
Clear the path from the trainer to the exit and measure narrow doorways, stairs, and turns. If low ceiling clearance is part of the move, compare low-height functional trainers and racks.
Take photos of the assembled trainer from several sides, then capture close-ups of cable routing, pulley positions, and hardware before you remove anything.
Gather resealable bags, masking tape, a marker, a phone or camera, and the tools named in the manual. Use a bag for each frame connection and write its location on the label.
Decide how the parts will travel before disassembly begins. If the route includes stairs, tight turns, or a long carry, arrange enough help to keep each section controlled instead of trying to solve the lifting plan while holding a frame piece.
If you need a broader checklist, read Moving a Functional Trainer: Pro Tips & Tricks. Keep the floor clear so removed parts and tools don't become trip hazards.
How do you make the trainer safe to take apart?
Stop using the trainer, remove attachments, and unload the weight stacks before starting. Follow the manual's steps for securing the machine and handling its weights.
Remove handles and accessories from the cables, then store them together. Lower any adjustable arms or movable parts only as the manual directs, and keep fingers clear of pinch points.
Don't cut, disconnect, or loosen a cable under tension. If you can't tell whether a cable or stack component is loaded, stop and contact Centr support.
Check the trainer's stability before loosening a connection. Have another adult steady a section if the manual calls for help, and don't start on a frame joint that would leave the remaining structure unsupported.
Should you remove cables during Centr 3 functional trainer disassembly?
Remove cables only when the manual says to disconnect them. Cable paths can be difficult to recreate, and a wrong route can affect how the trainer moves after reassembly.
Photograph each pulley and cable connection before removal. Mark both ends with matching labels, and avoid sharp bends, knots, or contact with grease, dirt, or sharp hardware.
If cable removal isn't required to separate the frame, keep the cable system together and protect it from snags. Don't use a cable as a handle or tie-down point.
Which Centr 3 parts should you remove first?
Use the manual's sequence, starting with removable accessories and covers before structural sections. The exact order may vary by model and assembly, so don't rely on a generic trainer diagram.
Keep each removed part beside the frame section it came from until you've labeled and bagged its hardware. Photograph brackets and fasteners in place, then take another photo after removal if the connection is hard to understand.
Never loosen a major frame joint while the trainer is unstable or unsupported. Ask another adult to steady a section if the manual calls for help, and use suitable lifting equipment for heavy parts.
The MQRW set suits someone who wants several portable workout tools while a larger machine is out of use. Skip it if you want a cable trainer replacement: its push-up board, bands, bars, and other accessories are a different kind of training setup.
How should you label cables, bolts, and frame sections?
Label each part by its location and removal order. A simple system such as “left upright, upper bracket, step 2” is easier to follow than a bag marked only “bolts.”
Keep fasteners with their matching frame section in a closed bag. For similar-looking bolts, label the hole or bracket they came from and take a close-up photo with a ruler or another scale nearby.
Mark cable ends with matching pairs, such as “A1” and “A2,” without placing tape where it could leave residue on a moving surface. Save the photos in an album named for the move so they are easy to find during reassembly.
For a general method and safety checklist, see How to Disassemble a Functional Trainer for Moving. Use its broad guidance alongside the Centr 3 manual.
How do you pack the trainer for transport?
Protect each section so metal edges, moving parts, and cables cannot rub against one another. Wrap frame pieces with moving blankets or suitable padding, then secure the wrap without covering labels or trapping hardware against a finish.
Keep small hardware in a sealed container that travels with the trainer. Place weight-stack parts flat and stable as directed by the manual, and don't stack heavy plates where they can slide.
Store cables in broad, loose loops if the manual allows them to remain attached. Keep them away from sharp corners and don't let other equipment rest on them.
The Merach Q1S is a separate option for someone who wants a rowing machine for home workouts while the trainer is packed away. Compare low cost rowing machines for another home workout option.
It measures 65 in long, 19.3 in wide, and 24.8 in high, so check that its footprint and planned storage space fit your room.
The Q1S suits a home rower buyer who wants magnetic resistance, app-supported workout options, and a machine that can be moved around on its base wheel. Skip it if your priority is a functional trainer or if you need a rowing machine for an exerciser taller than its stated height fit of 6 ft 5 in.
Check the path and lifting plan for each box or section before carrying it. For help planning the transport itself, read How to Move a Functional Trainer?.
How can you avoid common disassembly mistakes?
Don't guess, rush, or take apart loaded components. Moving problems often start when a part is removed without a photo, hardware gets mixed, or the frame shifts unexpectedly.
Avoid these mistakes:
- Removing cables without documenting their route.
- Mixing bolts from different joints in one container.
- Letting removed sections lean unsecured against a wall.
- Carrying a heavy section alone when the manual calls for help.
- Using cable, pulleys, or adjustable arms as lifting points.
- Forcing a fastener that doesn't turn as expected.
Avoid replacing the manual's sequence with a generic online tutorial. A different trainer may have similar-looking uprights or pulleys, but that doesn't confirm its steps apply to your Centr 3.
If a fastener is stuck or the frame begins to move, stop and stabilize the trainer before continuing. Don't use extra force or improvise a support point.
What should you check before loading the trainer?
Confirm every loose part is secured and each section is labeled before it leaves the room. Compare the packed parts with your photos and the manual's parts list.
Close and secure hardware bags, then place them in a box that won't be crushed by frame sections. Keep the manual and photos accessible during the move rather than burying them in a packed box.
Check that no weight, bracket, or cable can shift during handling. If you're moving to a new home, How Do You Move a Functional Trainer to a New House? covers route planning and unloading.
The YOSUDA rowing machine has 16 magnetic resistance levels and a digital monitor that displays workout data. Its listed fit is for users between 4 ft 5 in and 5 ft 11 in, so check that range before choosing it.
The YOSUDA suits someone seeking a magnetic rower with app-connected training and a compact storage footprint. Skip it if the intended user is outside its stated height range or if a rowing machine doesn't meet your training needs.
How do you reassemble the Centr 3 after the move?
Reassemble the trainer by reversing the manual's steps and using your labels and photos to confirm each connection. Work on a level surface with enough room to position the frame safely.
Keep the trainer unloaded while you reconnect frame sections and cables. Tighten fasteners as directed, check that cables follow the documented route, and make sure moving parts travel freely before using the machine.
Don't test the trainer with a person or weight on it if a connection is uncertain. Contact Centr support or a qualified technician to resolve unclear steps or damaged parts.
Before the first workout, review the functional trainer safety checks. Treat the first movement check as a careful inspection: stop if a cable binds, a section shifts, or the machine makes an unfamiliar noise.
When should you get help with a Centr 3 move?
Get help when a section is too heavy to control, the manual is unavailable, or cable and stack connections are unclear. A second person or qualified mover can help keep the frame stable while you work.
For a short move through a clear route, you may be able to keep some assemblies intact if the manual allows it and the unit stays controlled. If the route includes stairs, tight turns, or a long carry, plan for more help and break the job into manageable sections.
Use the manual for model-specific disassembly, the move guides for route planning, and a qualified technician if a cable or weight-stack connection remains unclear. That decision keeps the job within what you can identify and control, which matters more than finishing quickly.
Frequently asked questions
Can I disassemble a Centr 3 without its manual?
You can document the setup and remove only parts you can identify, but don't guess how cables, pulleys, or weight-stack parts connect. Find the manual for your exact Centr 3 version or contact Centr support before taking apart an unfamiliar assembly.
Keep the trainer stable and unloaded while you wait.
Should I remove the weight stacks before moving a Centr 3?
Unload the stacks and follow the manual's steps for securing or removing them. Weight plates can shift and create a crush hazard if a frame section tilts.
Don't remove selector rods, cables, or stack guides by guesswork.
Get help with heavy sections.
Can I move a functional trainer without taking it apart?
That depends on the trainer's assembled dimensions, weight, route, and moving equipment. Measure doorways and turns, and check the manual for approved handling points.
If the unit can't pass safely or remain controlled, disassemble it as directed and move its sections separately.
How should I keep Centr 3 hardware organized?
Put each hardware group in a labeled bag and attach it to the section it came from. Photograph the connections before removal and label both ends of cables.
Keep a written order for the steps, and store small parts in a closed box that travels with the frame.