How to Do Cable Calf Raises?
On this page (10 sections)
- Mastering the Cable Calf Raise Technique
- Setting Up Your Cable Calf Raise Station
- Executing the Cable Calf Raise: The Movement
- Breathing Techniques for Calf Raises
- Common Mistakes to Avoid
- Progressing Your Cable Calf Raises
- Frequency and Volume Recommendations
- Checklist for Your Next Calf Raise Session
- Conclusion
- Frequently Asked Questions
To do cable calf raises effectively, you should focus on proper form and a full range of motion. This exercise targets the gastrocnemius and soleus muscles in your lower legs, helping to build muscle size and strength. By controlling the movement, you can maximize your results and reduce the risk of injury.
Cable calf raises offer a great way to isolate your calf muscles. You can easily adjust the weight to match your strength level. Many people find this exercise helps them develop well-proportioned legs. Remember, consistency is key for seeing lasting improvements.
- Set up the cable machine correctly.
- Position your feet for optimal calf engagement.
- Control the upward and downward movement.
- Listen to your body and adjust weight as needed.
- Focus on feeling the stretch and contraction in your calves.
Let’s walk through exactly how to do cable calf raises, step by step, so you can get the most out of this effective exercise.
Mastering the Cable Calf Raise Technique
Ready to build stronger, more defined calf muscles? You’ve come to the right place. The cable calf raise is a fantastic exercise for this. It allows you to really isolate those lower leg muscles. We’re going to break down exactly how to do it right. Let’s get your calves growing!
Setting Up Your Cable Calf Raise Station
Before you even step up to the machine, a proper setup is key. This ensures you get the most out of the movement. It also helps you avoid putting unnecessary strain on your body. Think of it as laying the groundwork for a great set.
Choosing the Right Machine and Weight
Most gyms have a standing calf raise machine. It usually has a padded shoulder rest and a platform for your feet. Some cable machines might allow for a variation if this specific machine isn’t available, but the dedicated one is ideal. For the weight, start lighter than you think you need. It’s always better to gradually increase the resistance. This helps you focus on form first. We found that beginners often overestimate their starting weight. Aim for a weight that allows you to complete 10-15 repetitions with good control. It’s important to focus on form first, and our guide covers common mistakes beginners make on a functional trainer.
Positioning Your Feet for Maximum Engagement
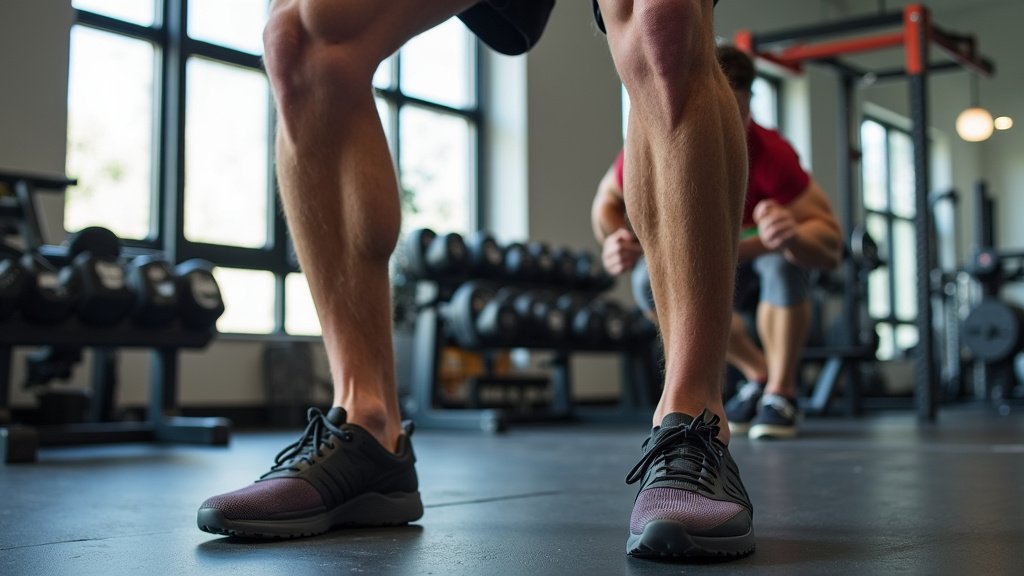
This is where a lot of people miss out on the full benefits. You want to place the balls of your feet on the edge of the platform. Your heels should hang off the back. Make sure your feet are about hip-width apart. Some people like to angle their toes slightly outward, like a “duck foot” stance. Others prefer them straight ahead. Experiment to see what feels most comfortable and allows for the greatest range of motion. The goal is to feel a good stretch in your calves at the bottom of the movement. Your feet should feel stable and secure on the platform.
Adjusting the Shoulder Pad
The shoulder pad should rest comfortably on the top of your traps, just above your collarbone. It shouldn’t be digging into your neck. You want enough pressure to stabilize the weight, but not so much that it’s painful or restricts your breathing. If the pad is too high, it might put pressure on your neck. If it’s too low, it might slip. Adjust it so it feels secure and you can maintain an upright posture throughout the exercise. Many guidelines recommend maintaining a neutral spine during all weight training exercises (National Strength and Conditioning Association).
Executing the Cable Calf Raise: The Movement
Now that you’re set up, let’s talk about the actual lift. This is where the magic happens. We’ll go through the concentric (lifting) and eccentric (lowering) phases. Focus on control at every step.
The Lowering Phase (The Stretch)
Begin by slowly lowering your heels as far down as you comfortably can. You should feel a deep stretch in your calf muscles. Resist the urge to drop your heels quickly. This eccentric portion of the lift is really important for muscle growth. Many studies show that slow, controlled eccentric movements can lead to greater hypertrophy, or muscle building (Journal of Strength and Conditioning Research). Let gravity do some of the work, but guide the weight down. Hold this stretched position for a moment. Make sure you’re not going so low that you feel pain in your Achilles tendon.
The Lifting Phase (The Squeeze)
From the bottom stretched position, powerfully push through the balls of your feet. Lift your heels up as high as you possibly can. Think about squeezing your calf muscles at the very top. Imagine trying to get your calf muscles as short as possible. You want to reach the peak contraction. Hold this squeezed position for a second or two. This is where you really focus on feeling the muscle work. Avoid shrugging your shoulders or using momentum from your upper body. This movement should be driven solely by your calf muscles.
The Return to the Start
After holding the contraction at the top, slowly and controlled, lower your heels back down to the starting stretched position. Again, focus on the eccentric control. This brings you back to the beginning of the next repetition. The entire movement should be fluid. It shouldn’t feel jerky or rushed. The tempo is important for building muscle. A common recommendation is a 2-second lift, a 1-second hold at the top, and a 3-second lowering phase.
Breathing Techniques for Calf Raises
Don’t forget to breathe! Proper breathing helps you stabilize your core and deliver oxygen to your muscles. A good general rule is to inhale during the lowering (eccentric) phase. Then, exhale forcefully during the lifting (concentric) phase. When you’re at the peak contraction, you should have exhaled most of the air. This helps you generate more power. It also helps you maintain core tension throughout the set. Think of it like giving your muscles extra fuel.
Common Mistakes to Avoid
Even experienced lifters can fall into bad habits. Let’s make sure you’re avoiding the pitfalls that can limit your gains or lead to injury.
Not Going Deep Enough
If you’re not getting a full stretch at the bottom, you’re missing out on a huge part of the exercise. You need to let those heels drop. Without that deep stretch, you’re not working the muscle through its entire range of motion. This can hinder muscle development. Remember, we want to work the muscles through their full potential.
Using Too Much Weight
This is a big one. When the weight is too heavy, you’ll start to compensate. You might bend your knees slightly or use momentum. This takes the tension off your calves. It also puts stress on your lower back and knees. It’s better to lift less weight with perfect form than more weight with sloppy form. This is a principle supported by many sports science organizations.
Moving Too Quickly
Calves, like other muscles, respond well to time under tension. If you’re just quickly bouncing through reps, you’re not giving the muscle enough time to work. Slow down. Control both the upward and downward movement. Feel the stretch and feel the squeeze. This methodical approach will yield much better results. Patience pays off here.
Not Reaching Full Extension at the Top
At the peak of the movement, you want to actively squeeze your calves. Don’t just lift your heels and come right back down. Hold that contraction for a moment. Really focus on contracting the muscle as hard as you can. This peak contraction is vital for signaling muscle growth. It’s like the exclamation point on your rep.
Progressing Your Cable Calf Raises
Once you’ve mastered the basic form, you’ll want to keep challenging your muscles. Progressive overload is the name of the game for continued gains. Here’s how you can do it:
Increase the Weight Gradually
This is the most straightforward method. When you can comfortably complete your target reps (e.g., 15 reps) with good form for multiple sets, it’s time to add a little more weight. Even small increases can make a difference. Don’t jump up too much at once.
Increase Repetitions or Sets
If you don’t want to increase the weight, you can add more reps to each set. Or, you can add an extra set. For example, if you usually do 3 sets of 12 reps, try for 3 sets of 15 reps. Or, you could do 4 sets of 12 reps. This increases the overall volume of work your calves are doing.
Slow Down the Tempo
As we touched on earlier, increasing the time under tension can be very effective. Try slowing down the eccentric (lowering) portion of the lift even further. Hold the peak contraction for a longer duration. This makes the same weight feel much harder.
Incorporate Pauses
Add a pause at the bottom of the stretch or at the top of the contraction for a second or two. This removes momentum and forces your muscles to work harder to control the weight through the entire range of motion. A pause at the top, especially, can really burn those calves.
Frequency and Volume Recommendations
How often should you do cable calf raises? And how many sets and reps? The answer can vary, but general guidelines exist. For most people looking to build muscle, training calves 2-3 times per week is effective. This allows for adequate recovery between sessions. Research suggests that hitting a muscle group multiple times a week can be beneficial for hypertrophy (Journal of Applied Physiology). A typical starting point is 3-4 sets per session. The rep range of 10-15 is often cited for muscle growth. However, you might find success with slightly higher reps, like 15-20, especially as you get stronger. Listen to your body and adjust as needed. For muscle growth, it’s recommended to train calves 2-3 times per week, and our guide details the best cable machine workout split for beginners.
Checklist for Your Next Calf Raise Session
Keep this handy for your next workout:
- Setup: Ensure shoulder pad is comfortable and weight is appropriate.
- Foot Placement: Balls of feet on edge, heels hanging off, hip-width apart.
- Lowering: Slow and controlled stretch, feeling it in the calves.
- Lifting: Powerful push through balls of feet, squeeze at the top.
- Breathing: Inhale on the way down, exhale on the way up.
- Control: Maintain a steady, deliberate pace throughout.
Conclusion
You’ve now learned how to perform cable calf raises with precision and confidence. Remember to focus on a full range of motion, controlling both the stretch and the squeeze. Proper setup and intentional movement are your keys to building stronger, more defined lower legs. Don’t be afraid to experiment with foot placement to find your sweet spot. Ready to put this into practice? Your next workout is the perfect time to incorporate these exercises and start seeing those gains.
Frequently Asked Questions
How many cable calf raises should I do per workout?
For muscle growth, aiming for 3-4 sets of 10-15 repetitions per workout is a good starting point. You can train calves 2-3 times per week, allowing for recovery. Pay attention to how your muscles respond and adjust your volume accordingly.
Can I do cable calf raises without the machine?
Yes, you can perform variations like standing calf raises on a step or using dumbbells. While the cable machine offers consistent tension, these alternatives can still be effective for targeting your calf muscles.
What’s the difference between standing and seated calf raises?
Standing calf raises, like the cable version, primarily target the gastrocnemius muscle because your knee is straight. Seated calf raises, with bent knees, place more emphasis on the soleus muscle, which lies underneath the gastrocnemius.
Why do my calves not grow despite doing calf raises?
Several factors could be at play. Ensure you’re using a full range of motion, focusing on time under tension, and progressively overloading your muscles. Calf muscles can also be stubborn; consistency and proper form are key.
Should I feel pain in my calves during the exercise?
You should feel a muscular burn or fatigue, but not sharp pain. If you experience pain, especially in your joints or Achilles tendon, stop the exercise. It might indicate improper form or the need to reduce the weight.